Design Process
Not to be confused with the preceding section, this section explains how the designers complete the assignments as outlined previously. The prior section highlights the strategy; this section explains the implementation and execution. As is the case with developing any product or service, a set of steps typically build on the previous that a team follows from concept through launch. The Digital Design process is no different, albeit, for efficiency’s sake, several elements run concurrently to manage and maximize human and artistic resources.
Establishing a well-structured process is essential for two primary reasons: It has been measured so that each design element has enough time to complete their section effectively, and it provides a realistic foundation for meeting the creative deadline.
The general design flow for digital interfaces is as follows:
- Defining the product vision/concept
- Research and development
- User analysis/identification
- Ideation/visualization
- Design implementation
- Testing and validation
- Post-launch modifications/advancements

Define the Vision / Concept Development:
Without a Vision, There is no Visual
One of the most important, if not the most important, phases of product design starts long before any fingers hit the keyboard. Before you can create a design, prototype, mock-up, or even a sketch of what a product will look like, you must first construct and compose a complete understanding of its purpose, the context for existence, meaning, and value. During this first phase, the team must outline the vision, the concept, and the strategy for its use. It’s only at that point can any designer reverse engineer into the look and feel of a product. Everyone on the team must understand the who, what, where, why, how, and when.
At some point, we’ve all worked on a project where the overall goal was misunderstood or even non-existent. Think about your own experience. How well did that product perform? Probably not too well. Without a purpose or the “why,” there is no direction, meaning, or collaborative construction that makes sense. Believe it or not, this type of thing happens more often than not. The root cause is usually that the product manager hasn’t properly identified, explained, or communicated the product’s vision. This is among the most important jobs of the product/project manager.
They are the central figure positioned in such a way that they are the wheel hubs, and each of the team members represents a spoke, as does the client, the developers, the marketing and sales teams, etc. This central figure must ensure a common message, vision, ensure that the concept is properly passed out to each spoke cohesively and compellingly so that each can do their respective jobs properly. If the hub fails, the spokes fail as well since they are operating in a vacuum.
The product manager is responsible for ensuring the client’s vision is properly explained orally, visually, contextually, and graphically. Without a vision, there is no visual. Unfortunately, this scenario happens all too often. In most cases, with negative consequences. As the old Japanese proverb goes, “Vision without action is a daydream. Action without vision is a nightmare.”
Every design project needs a product vision that sets the direction and guides the entire development process. The vision captures the essence of the product — it is the critical information that the product team must know to develop and launch a successful product. The vision represents the big picture of “what we are trying to build here and why?” Identifying the vision early on also ensures a common understanding of what not to build. From the onset of any project, boundaries must be clear, comprehensive, and highly conceptual so that the team can focus on accomplishing the priorities and reaching the solution without distractions or confusion. The more effective this first phase is, the more efficient, productive, and profitable the balance of the product development process becomes.
Defining the vision is, however, only half the battle. The other half represents the complementary strategy. The strategy defines a product’s journey. If the vision defines the destination (the target condition) — the ultimate user experience toward which you’re aiming, the strategy defines the “how” you will reach the target condition, so you know exactly what it is you need to build. If you set the goal (the challenge), then you’re more likely to conceptualize the path for reaching the goal. In design, this framework is similar to the ever-popular sales funnel strategy. A sales funnel details and define the user’s journey from the first touchpoint with a product to conversion. In design, the visual path the user experiences by way of sight, sound, smell, and touch help you develop a feeling about the product.

Product Research and Development
Once you understand where you need to go and how you plan to get there, you must build your knowledge base. It would help if you become an expert in the product you will be building and its industry, peers, expectations, target audience, and preferences. To build a product with high adoption potential, you need to know every detail of every aspect of existence, what works, what doesn’t, what’s popular and what has failed, why users buy or don’t buy this product. You need to invest in education to ensure you have a 360-degree view of all aspects of your new project. If the target audience is men, age 25-40, you might want to rethink whether or not to use pink as the primary color of your new video game character (more later about colors.)
Before you dive in, it is worthwhile to determine your research’s purpose, perhaps outline the list of questions you and/or the future user may ask about the product. You’ll want to identify competing products so you can study their design concepts and, of course, search for any reviews or recommendations from both users and peers who may have already done a lot of the homework for you. It’s not wise to dive right into the design process when a new project lands on your desk. You can save yourself a tremendous amount of time, your agency a ton of resources, and your client a lot of money if you do your homework first and become an expert in the product, industry, and user base.
Upon completing your thorough research and having aligned your thoughts with your team, you should be able to agree, as a team, as to how the design segment should go from here. This will allow you to remain focused without sidetracking on any tangents, as your entire team will be working from the same page.
The following highlights some of the questions you might seek to define during the research process:
- What is the purpose of the research? What are you looking to find?
- What is the primary and secondary application of the product, is it used more in certain geographic locations, and, if so, why? What are the key features - why/why not? Key usage scenarios? Future features and functionality?
- What does the competitive environment look like now? How will your product disrupt this environment? What features and benefits are most popular and why?
- Is there special technology or techniques required or expected?
- Who is the target audience of the application? What are their demographics? What are their likes and dislikes? Identify ethnography and the parameters of the target users that you need to decipher about them? What is the behavior you will try to extract or encourage action from them? For more information on this subject, check out “Basic Marketing Research”1 (G. Churchill, T. Brown).

- Perform a qualitative study of the target user group, including their needs, demographics, behavior, hobbies, profession, education, stage of life issues or challenges, purchase barriers, and their motives for making purchase decisions? Qualitative research at this stage is conducted with a limited group of users (interviews, focus groups, etc.). By experimenting with a large enough sample size, we can reach some nontraditional conclusions which would have been impossible to predict with any theoretical articles/books. Users in our experiment would indicate product/feature-specific issues or improvements, which would be very difficult to find using literature alone. Hosting your focus groups or research studies will typically provide greater accuracy and more precise feedback regarding your specific product from a group of people that may have unique characteristics or specialties related to your study and/or to your study conditions.
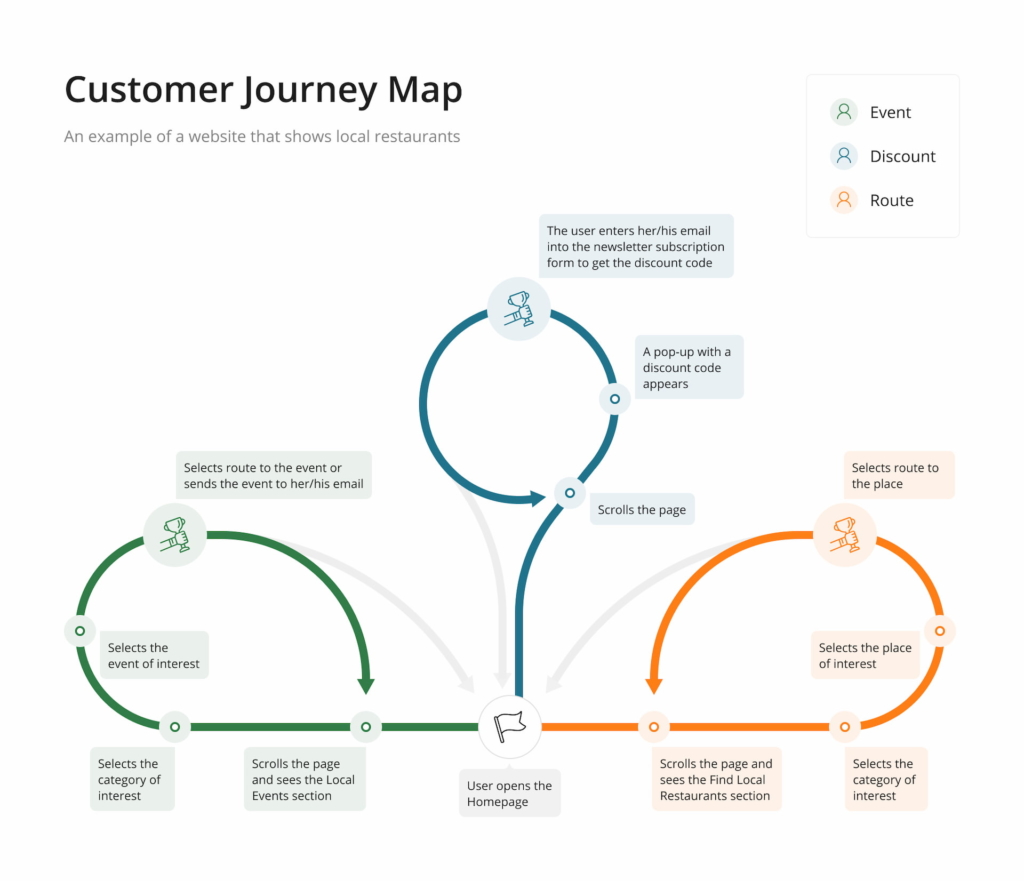
- Begin to outline the user demographics for the Customer Journey Map (CJM). When formulating your audience segmentation, imagine that you are creating a profile for the user on a social media outlet, be thorough, be detailed. The more you describe, the easier it will become to understand this persona. Attempt to create a full-scale profile including age, gender, interests, clubs, preferences, etc.
- While diving into the history, background, opinions, references, etc., start flushing out the CJM based on your research findings. You’ll want to start identifying the user’s greatest likelihood of high interaction with the product and/or how to improve the interaction.
- Formulate the problem that your product solves. In the case that you are given a product and have been charged with conducting a series of revisions, upgrades, or modifications, you might start with a limited universe focus group to ask some initial questions to gauge which elements of the existing product are satisfactory vs. those that need to be revised. The product is developed to address some needs, answer some questions, solve some problems. Reverse engineer your story to back into the question of what users are facing: that they will need this item and frame the journey, thought-process, whatever considerations the user may go through that the result will be your product.
- If you find yourself questioning results and/or assumptions, trying it out on a sample size of users can help you determine fact from fiction. For example, if a user navigates away from your prototype. You might ask them what was missing that they didn’t add the product to their shopping cart or, if they did add it to their cart by did not buy the product, you might ask them to explain the reason for abandoning their cart? Or, you might inquire about what would have prompted them to complete the checkout process? What features, details, CTAs were noticeably different than what you would have expected? Use these individuals to draw out as much rich qualitative insight as possible. These are potentially your actual future users so take advantage of the feedback they are giving. The nature of your questions will change depending on whether you are showcasing a new prototype to a user or an enhanced product, so bear in mind that the user may or may not have some experience with your product or none at all.
- If possible, the best way to sample your users is with a prototype/design. If not, before this process, the prototype should be developed immediately following this step. This is best completed in the form of a clickable prototype on the actual device from which users will interact. This will ensure that users are testing with the intended device as cross-resolution and code dilution are not a good use of time or effort. Cross-device testing at this stage, for example, a mobile app on a desktop device or vice versa, isn’t recommended as it will undoubtedly result in a poor user experience.
You may even want to spell out the big picture on a whiteboard for the whole team to see as a reminder of the end goal. This isn’t to say that you should be so rigid that you won’t be open-minded to hear plausible suggestions. Rather, it’s a means for keeping the team focused and on the same page. This also does not suggest you should dismiss new ideas. Especially in the visual arts, new ideas and creativity are the lifeblood of what we do.
Allow team members to bring new concepts to the table. Just do it in a way that is not disruptive to the creative process and that if and/or when a change will be made, the entire team understands and agrees with the goal. The goal must always be specific and valid and should clearly outline who is responsible for which aspect so there isn’t any confusion later on. You might create a task list with who is assigned to each task.
Build a Customer Journey Map (CJM). The CJM allows you to formulate the user journey to see how it may be improved from the initial touchpoint through conversion. When building a map, actual users are used by way of 1 user - 1 map of the way.
Naturally, once you’ve completed the research phase, and followed with a concept model in the form of a prototype, finally, it is time to prepare your design for internal page development. An important point in any design process, which should go without saying but doesn’t always, is that you should make sure to keep the client in the loop, even if it’s a simple design modification. It’s better to over-communicate than under-communicate, not to mention it’s common courtesy and respectful when they are paying the bill.
User Analysis
After research, the product team must make sense of the data they have collected. For every project, understanding the audience is crucial. This should not be a one-time process but should be constantly revisited as the project progresses. User needs and behaviors may evolve over time, market dynamics can change, and new competitive offerings can influence audience preferences. Therefore, keeping an updated understanding of the audience is key to designing a relevant and effective product. The analysis phase isn’t just about drawing conclusions from the data—it’s about turning those conclusions into actionable insights. This phase allows UX designers to deeply understand user wants, needs, and behaviors, forming the foundation for effective design strategies. Capturing, organizing, and making inferences about what users want, think, or need can help UX designers begin to understand why they want, think, or need such solutions. This data helps provide a context for designers as to the headspace of users to create based on a genuine human need.
Ideation
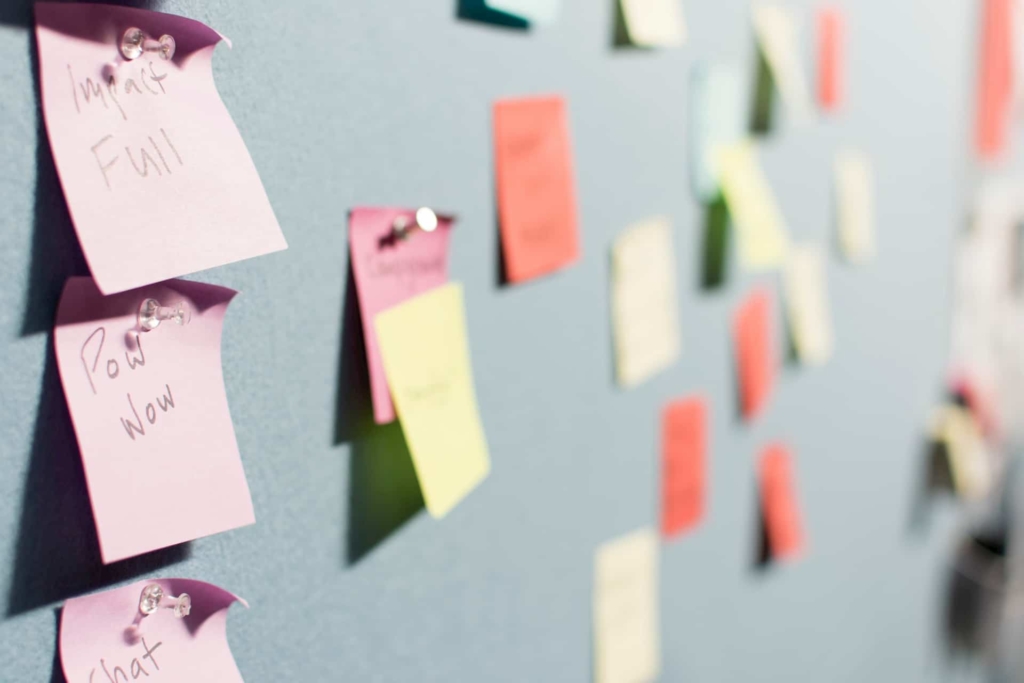
The ideation phase is when team members brainstorm on a range of creative ideas that address the project goals. During this phase, it’s critical not only to contemplate and deliberate new ideas but also to confirm that the most important design assumptions are valid. With experience comes a rudimentary understanding of design concepts that bring a level of perspective to the table. As such, your team must include various skill sets so that all disciplines and opportunities are considered. Different strokes for different folks. The most junior member of the team could come with an idea just as easily as the managing director. However, there is a lot to be said for team members who have a lot of experience working on many creative processes that can share their insights with your team.
There are many different techniques used by product teams for the ideation process — from sketching, which helps visualize what certain aspects of the design will look like, to storyboarding, which is also useful for illustrating and demonstrating the various interactions of the functionality within a product.
Design
At this point, the creative team should have a clear understanding of the go-forward strategy and a mutual agreement amongst all members. During the design phase, the creative team builds the solution to address the client’s problem and implements all the identified concepts that will be tied together to birth the new product!
Prototyping
To deliver a favorable user experience, prototyping is a critical element in your design process. A prototype is an experimental model that enables you to test the functionality and look and feel before investing in building the final solution. A prototype often starts small, designing only a few core elements of a product (such as key user stories, similar to agile development) that will later grow in breadth and depth over additional iterations as new required features are built out. The finalized version of a prototype is what is ultimately passed on for development.
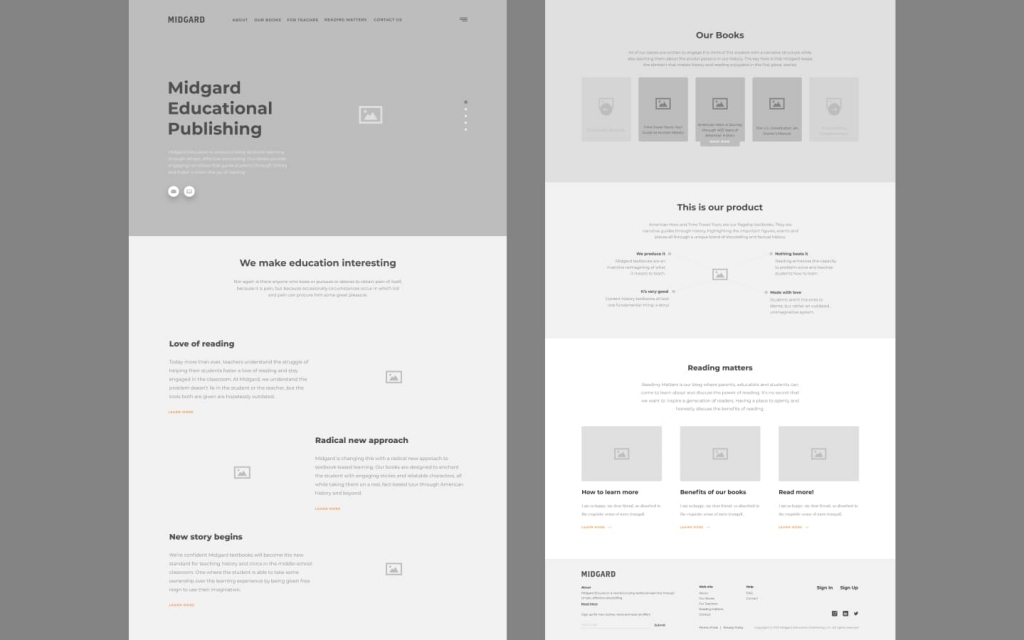
Prototyping is based on building the actual sample product for review, testing, and modification. It’s a crucial step that allows designers and stakeholders to identify potential issues early, reducing risk and saving time and resources in the long run. More specifically, prototyping consists of 3 steps:
- Build
Creating the actual product prototype sample for review and testing.
- Review
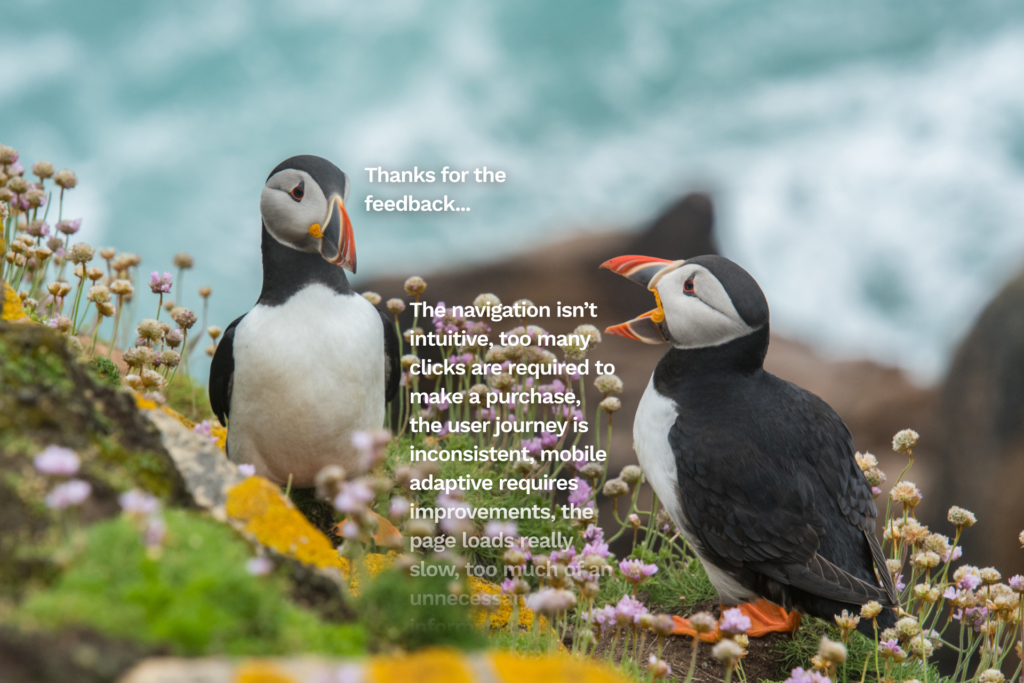
Sampling the prototype with actual users and stakeholders to solicit feedback and acquire and gather any recommendations or suggestions that give you an understanding of what is working and what is not.
- Refine
Using the user-generated feedback, identify areas that need to be refined, modified, or clarified. The list of refinements will form the Scope of Work (SOW) for your next design iteration.
Submitting Design to Dev
Upon completion of the prototype phase, the design should be prepared to pass on to production. This is when the design team is relieved, and the baton is passed to the engineers for coding. During the developer handoff, the designer must communicate each piece of the creative concept, the functionality, what it means, and how it is designed to look and feel. Multiple layers of information and detail need to be conveyed, and designers and developers must be on the same page. Just as designers don’t understand code, programmers don’t understand design. You don’t want to overwhelm the developers with unnecessary details. Still, you do want to ensure they have the complete set of directions to implement their piece of the development process.
Testing and Validation
The testing and validation phase helps the product team ensure the design concept is working as intended. Product testing is an art in itself. Do it wrong, and you’ll learn nothing. Do it right, and you might find incredible, unexpected insights that could change the entire product strategy’s trajectory.
Usually, the validation phase starts when the finalized design is flushed out. Similar to the product research phase, this phase also varies from project-to-project.
Post-Launch Activities
Post-Launch Activities
An official product launch does not mark the end of the creative process—it merely signals the beginning of the next phase. The launch is not a finish line, but a milestone in the product’s life cycle. It’s the start of a process of continuous learning and adaptation to ensure the product remains relevant and valuable to its users. You will find many designers who finish a product and wash their hands of it. If a new version or update is required, they start over from scratch. This is nothing more than an expensive ploy to draw further fees out of clients. It is this type of thing that gives agencies their bad name. This applies to the few, not the many, and, quite frankly, these firms are highly transparent in their operations. You can easily tell by the quality of their work and their employees and clients’ high turnover. We have, however, been the beneficiary of these actions in that we’ve gained some world-class staff and long-term and loyal clients that we respect and value. There are many ethical firms such as ours still around.

Typically, post-launch is just the terminology for the continual, ongoing review and modification process that continues in perpetuity or, at least, as long as the product is still in use. The team will learn and improve the product. Multiple iterations bring many relevant and educational opportunities for growth.
